Making Convincing Seamless Textures from Photographs
Part 3. Attention to Detail
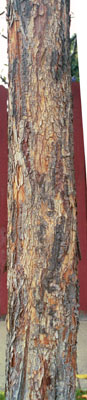
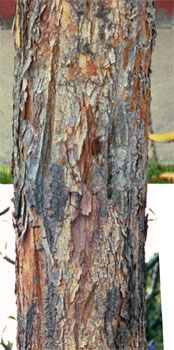
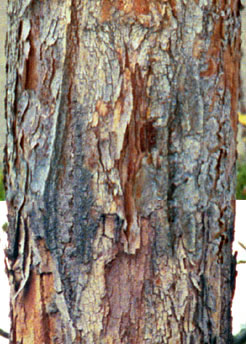
Here is another texture we want to tile in only one direction. It can be used as trees in the background of your renderings where not too much curve to the tree needs to be modeled (this way we can easily preserve the peeling bark of the tree. The image can also be made to tile in both directions if you need a full tree model. First, the image is rotated so that one edge of the tree trunk is vertical and then cropped to an appropriate height (try to get as much of the tree as you can before the tops and bottom of the image starts to show too much perspective. Even though the very base of the tree usually shows plenty of character, we will need to crop off the base since we are tileing this image rather than just creating a cutout.
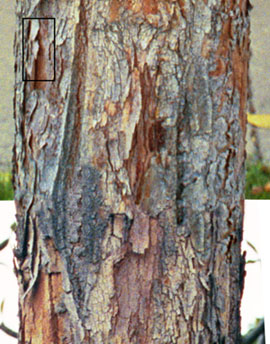
First, we apply the offset (A), then correct for perspective (B) and shading (C) as described earlier.
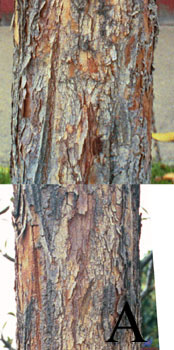

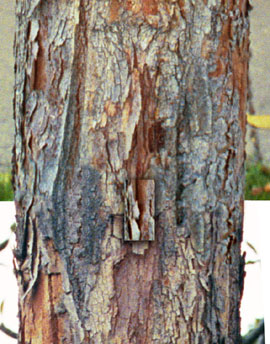
Now, if we try to remove the seam with just a few swipes of the clone tool, we get something very unsatisfying.
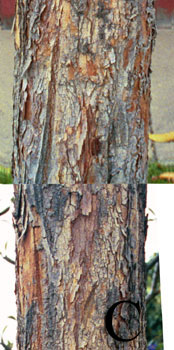
The problem is that the elements of the top and bottom half of the image do not match. There are long lines that abruptly terminate at the seam. Even if the lines were short, your eye would still pick up a horizontal line where all the vertical lines terminate. What we need to do is extend some the elements from the top half down to the bottom half and vise versa. So, being a little more careful with the clone tool, we can achieve the following image.
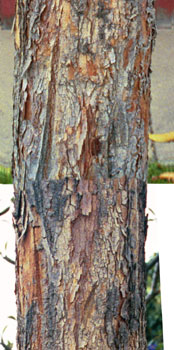
This looks much better. However, it can be improved. One weakness of the clone tool is that it can only duplicate. This can be quite limiting if you are trying to manipulate large areas of your image. It may also be difficult to find a needed element to copy. The above image, for example, has a large reddish feature at its center that dose not terminate at the bottom realistically. There are not many choices of elements in the image to clone and create a good termination. However, If you look to the upper left, there is a reddish element that can be used for a termination, only it is pointing up instead of down. Not a problem with Photoshop. Select the element and copy. Make sure you copy plenty of area around the element rather than trying to be careful at this point. Now, paste the selection into an empty layer and flip the layer (edit -transform-flip vertical). Mover the layer to where you want it and start erasing the unwanted portions. Adjust the hardness of your brush so that you have a soft edge but are not blurring the important portions of the layer. When everything looks right, merge the layer down.
 "
" </
</
Now, let's repeat over a few different areas.
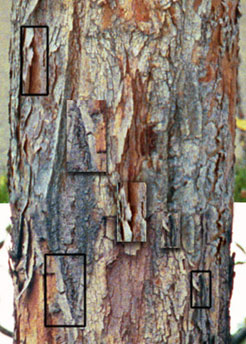
This is also a handy technique if you need to clone large areas of the image. Instead of cloning part of your image, clone the reverse of part of your image. The duplication will be much harder to notice.
![]()
Copyright © 2004 Bit Brush Graphics, 1501 Resaca Blvd., Austin, TX 78738
(512) 587-4700